
If you ride a Harley Davidson, then you know how exhilarating it feels to take off on your bike after a long day. You also might know how it feels to get a windshield full of dirt, dust, and bugs. While debris can be a huge annoyance to your daily ride, it can also wreak havoc on your motorcycle if you don’t regularly wash it off.
You paid a lot for your Harley—so make sure it looks as good as it did the day you rode it home by implementing a regular wash schedule.
Let’s jump into the ins and outs of washing your Harley Davidson.
Cleaning Products You’ll Need
It’s better to be equipped with the right products before you start washing rather than finding out you don’t have everything after it’s too late. To get started, you will need:
- Clean water
- Sponge or wash mitt
- Wheel spoke brushes
- The Absorber®
You will also need a polisher and sealant of your choice to complete the last step in your wash process.
Got everything? Good. Let’s get washing.
How to Wash A Harley
1. The Cool Down
Don’t do a single thing until your bike cools down. You could burn yourself or damage your bike by pouring cold water over a scorching hot engine. You wouldn’t pour orange juice into your cereal, would you? Just like two things that don’t go together, hot metal and cold water should never meet due to the risk of molecular expansion.
2. The Pre-Wash
Once your Harley has cooled, give it a quick tire-to-handlebar rinse with clean water. This will help loosen up any debris so you won’t have to scrub your Harley that much with your sponge. As a general rule of thumb, you should try to touch your motorcycle as little as possible to decrease the possibility of scratching it.
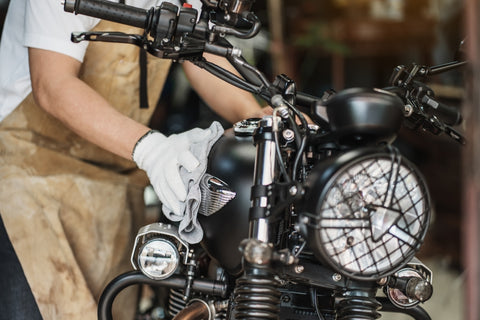
3. The Wash
Time for that elbow grease. Use two clean buckets for washing and rinsing, so you can keep the clean and soapy water separate. Scrub your Harley down on all surfaces—especially the spots where insects so rudely decided to hitch a ride. Start from the bottom with your wheel spoke brush and work your way up with your sponge or wash mitt. Rinse thoroughly.
4. Drying
Don’t you love it when you can finally dry off those water droplets to reveal that glistening paint job? It’s important to remove all excess water to avoid those annoying hard water spots. For the most efficient dry, use The Absorber®—an ultra-absorbent alternative to terrycloth towels and chamois. The Absorber® keeps your Harley Davidson free of hard water, scratches, and dust and comes in a convenient tube for easy storage.
5. Polishing & Waxing
Nope, you’re not done yet. Polishing and waxing will make your paint job shine as bright as the sun on a long summer ride, but it will also help repel the dust, dirt, and bugs you just worked so hard to remove. Use a motorcycle-approved polish and sealant with a soft cloth to buff your bike, so you can really stand out on the blacktop.
Make Your Harley Shine With the Absorber®
Time is of the essence when it comes to drying your Harley Davidson. Whether you’re washing your motorcycle or stuck in the rain, be equipped at all times with The Absorber®. Need to dry your bike on the go? Never hit the road again without bringing the Absorber® Mini along for the ride.